This tutorial gives a shot introduction how to get started manually labeling your own tracks,
for a quick evaluation or ground truths for the evaluation of automated algorithms.
Marked results and correlated images must be stored some where, there for the project hast to be named and saved.
Click on the save button and select a storage location and file name.
Note
Reference to images and video is stored relative as long a the files reside parallel or below in the path tree.
If the files reside above or on a different branch, drive, or network location, the absolute path is stored.
Before we can get started we have to specify a marker type. Marker types are like classes of objects, e.g. we might use
a class for birds and another one for ships. Every marker type can have multible tracks.
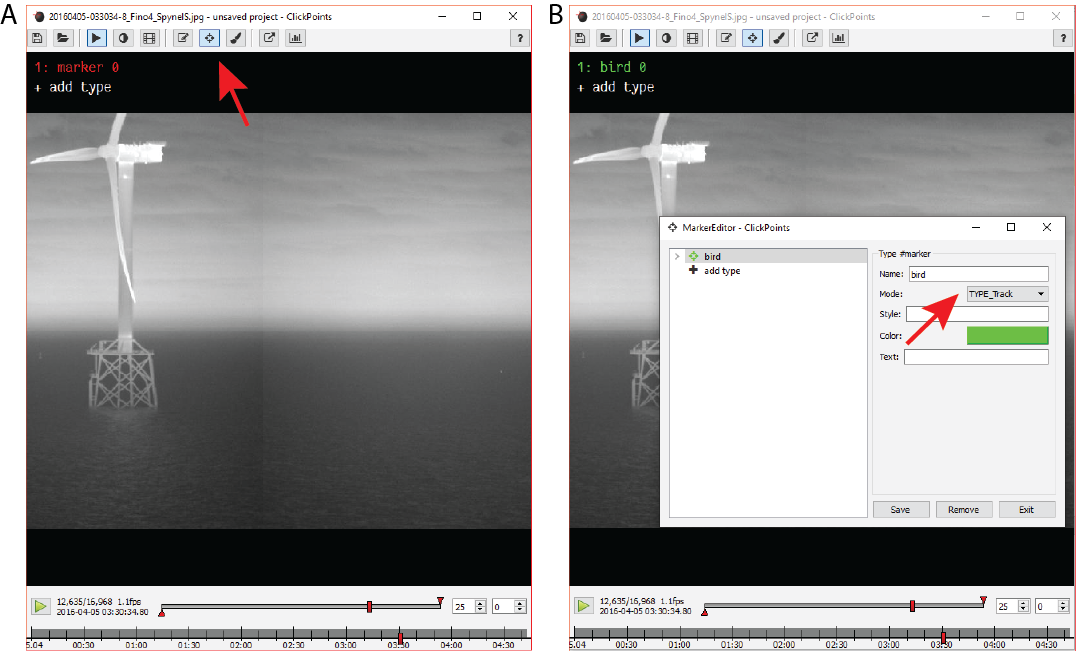
To open the marker menu either press F2 or click on the Marker button to switch to edit mode (Fig. A).
Then right click onto the marker list to open the marker menu (Fig. B). You can reuse the default marker or create a new marker
by selecting +addtype. Choose a name and color for your new marker type and make sure to set the type to TYPE_track.
Confirm your changes by pressing save.
To add more tracking types select +addtype and repeat the procedure.
left & right cursor keys to go one frame forward and backward
Jump a specified set of frames with the numbad keys. See Jumping Frames
Use the frame and time navigation slider to by clicking or dragging the cursor to the desired position.
Jump to a specific frame by clicking on the frame counter and entering the desired frame number
Press to play the dataset with the specifed frame rate or as fast as feasible.
Note
Due to the sequential compression of videos, traversing a video backwards is computational expensive. ClickPoints provides a
buffer so that the last N frames are stored and can be retrieved without any further computational cost. The default buffer size
can be specified in the config.
Warning
Be careful not to reserve too much RAM for the frame buffer as it will drastically reduce performance!
The setup steps are completed, we can begin to mark some tracks.
Activite the type of marker you want to use by clicking on the label “bird” or press the associated number key.
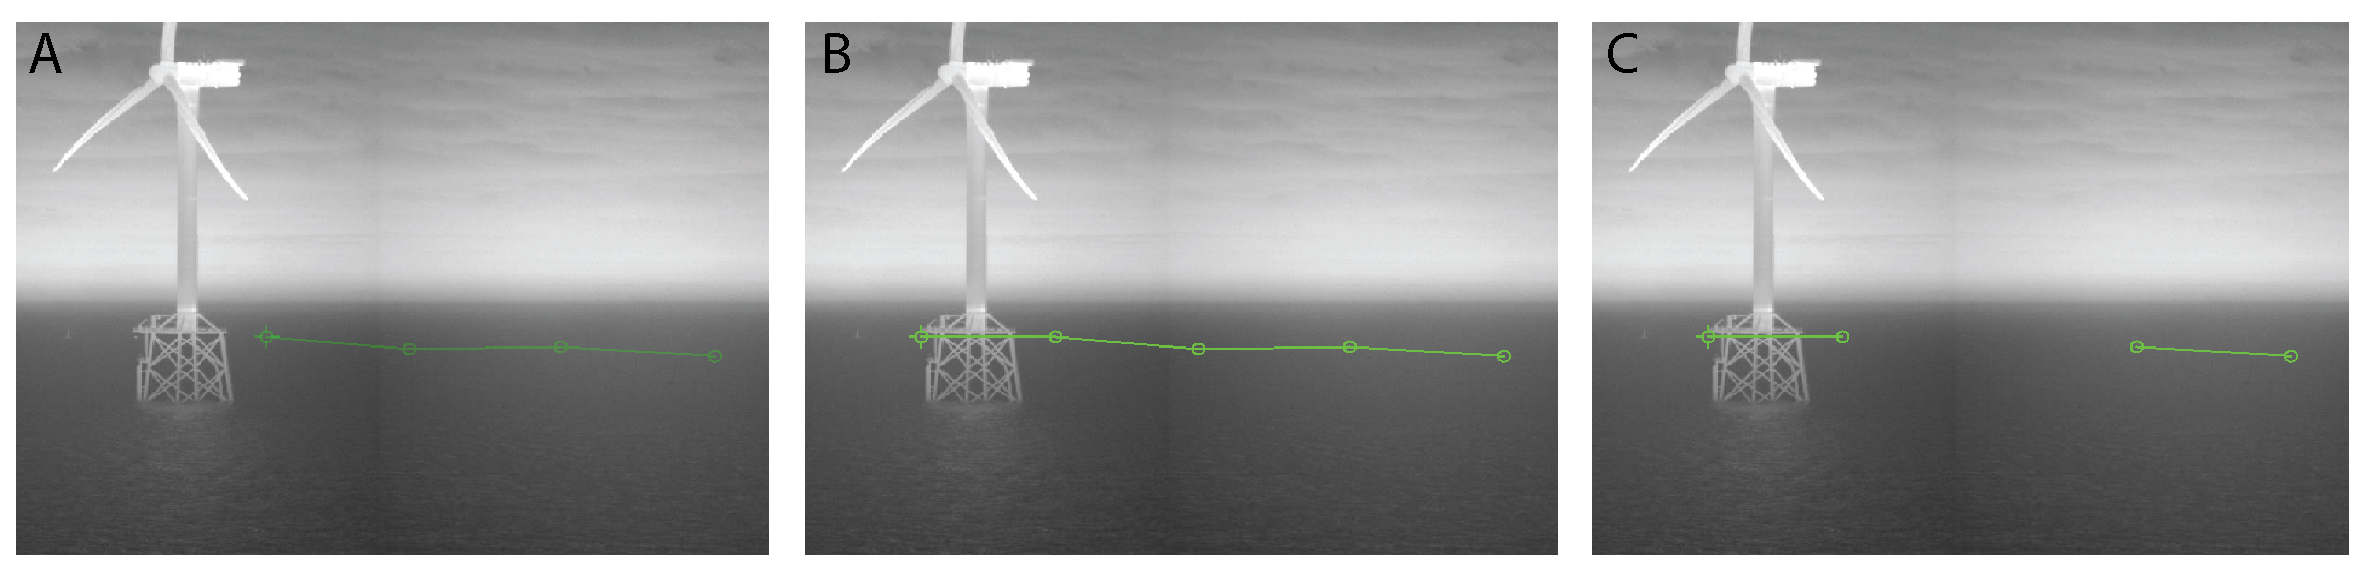
Set the first marker by clicking on the image.
Switch to the next frame using the right cursor key.
The track now shows up with reduced opacity, indicating there is no marker for the current frame.
Upon dragging the marker (left click & hold) to the current position (release) a line indicates the connection to the last position. The track shows up with full opacity again.
If a frame is skipped, the marker can be dragged as usual but no connecting line will appear. Indicating a fragmentation of the track.
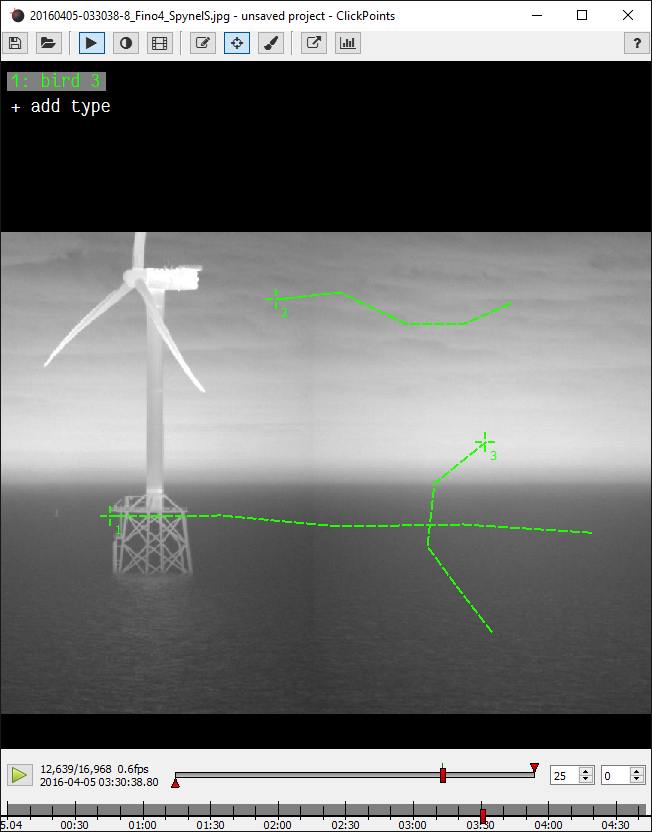
To create a second track, repeat step 1.
Markers are automatically save upon frame change or by pressing the S key.
For low density tracks ClickPoints provides the “connect nearest” mode. Clicking on the image will automatically connect
the new marker to the closest Track in the last frame. Speeding up tracking for low track density scenes. The dragging of
markers is still support and is usefull for intersecting tracks.
To activate “connect nearest” mode, set the config parameter tracking_connect_nearest=True.
and select a storage location and file name.
to switch to edit mode (Fig. A). Then right click onto the marker list to open the marker menu (Fig. B). You can reuse the default marker or create a new marker by selecting
to play the dataset with the specifed frame rate or as fast as feasible.